Consuming webhook events
At it's core, Inngest is centered around functions that are triggered by events. Webhooks are one of the most ubiquitous sources for events for developers. Inngest was designed to support webhook events.
This guide will show you how to use Inngest to consume your webhook events and trigger functions.
When talking about webhooks, it's useful to define some terminology:
- Producer - The service sending the webhook events as HTTP post requests.
- Consumer - The URL endpoint which receives the HTTP post requests.
Inngest enables you to create any number of unique URLs which act as webhook consumers. You can create a webhook for each third party service that you use (e.g. Stripe, Github, Clerk) along with custom rules on how to handle that webhook.
Creating a webhook
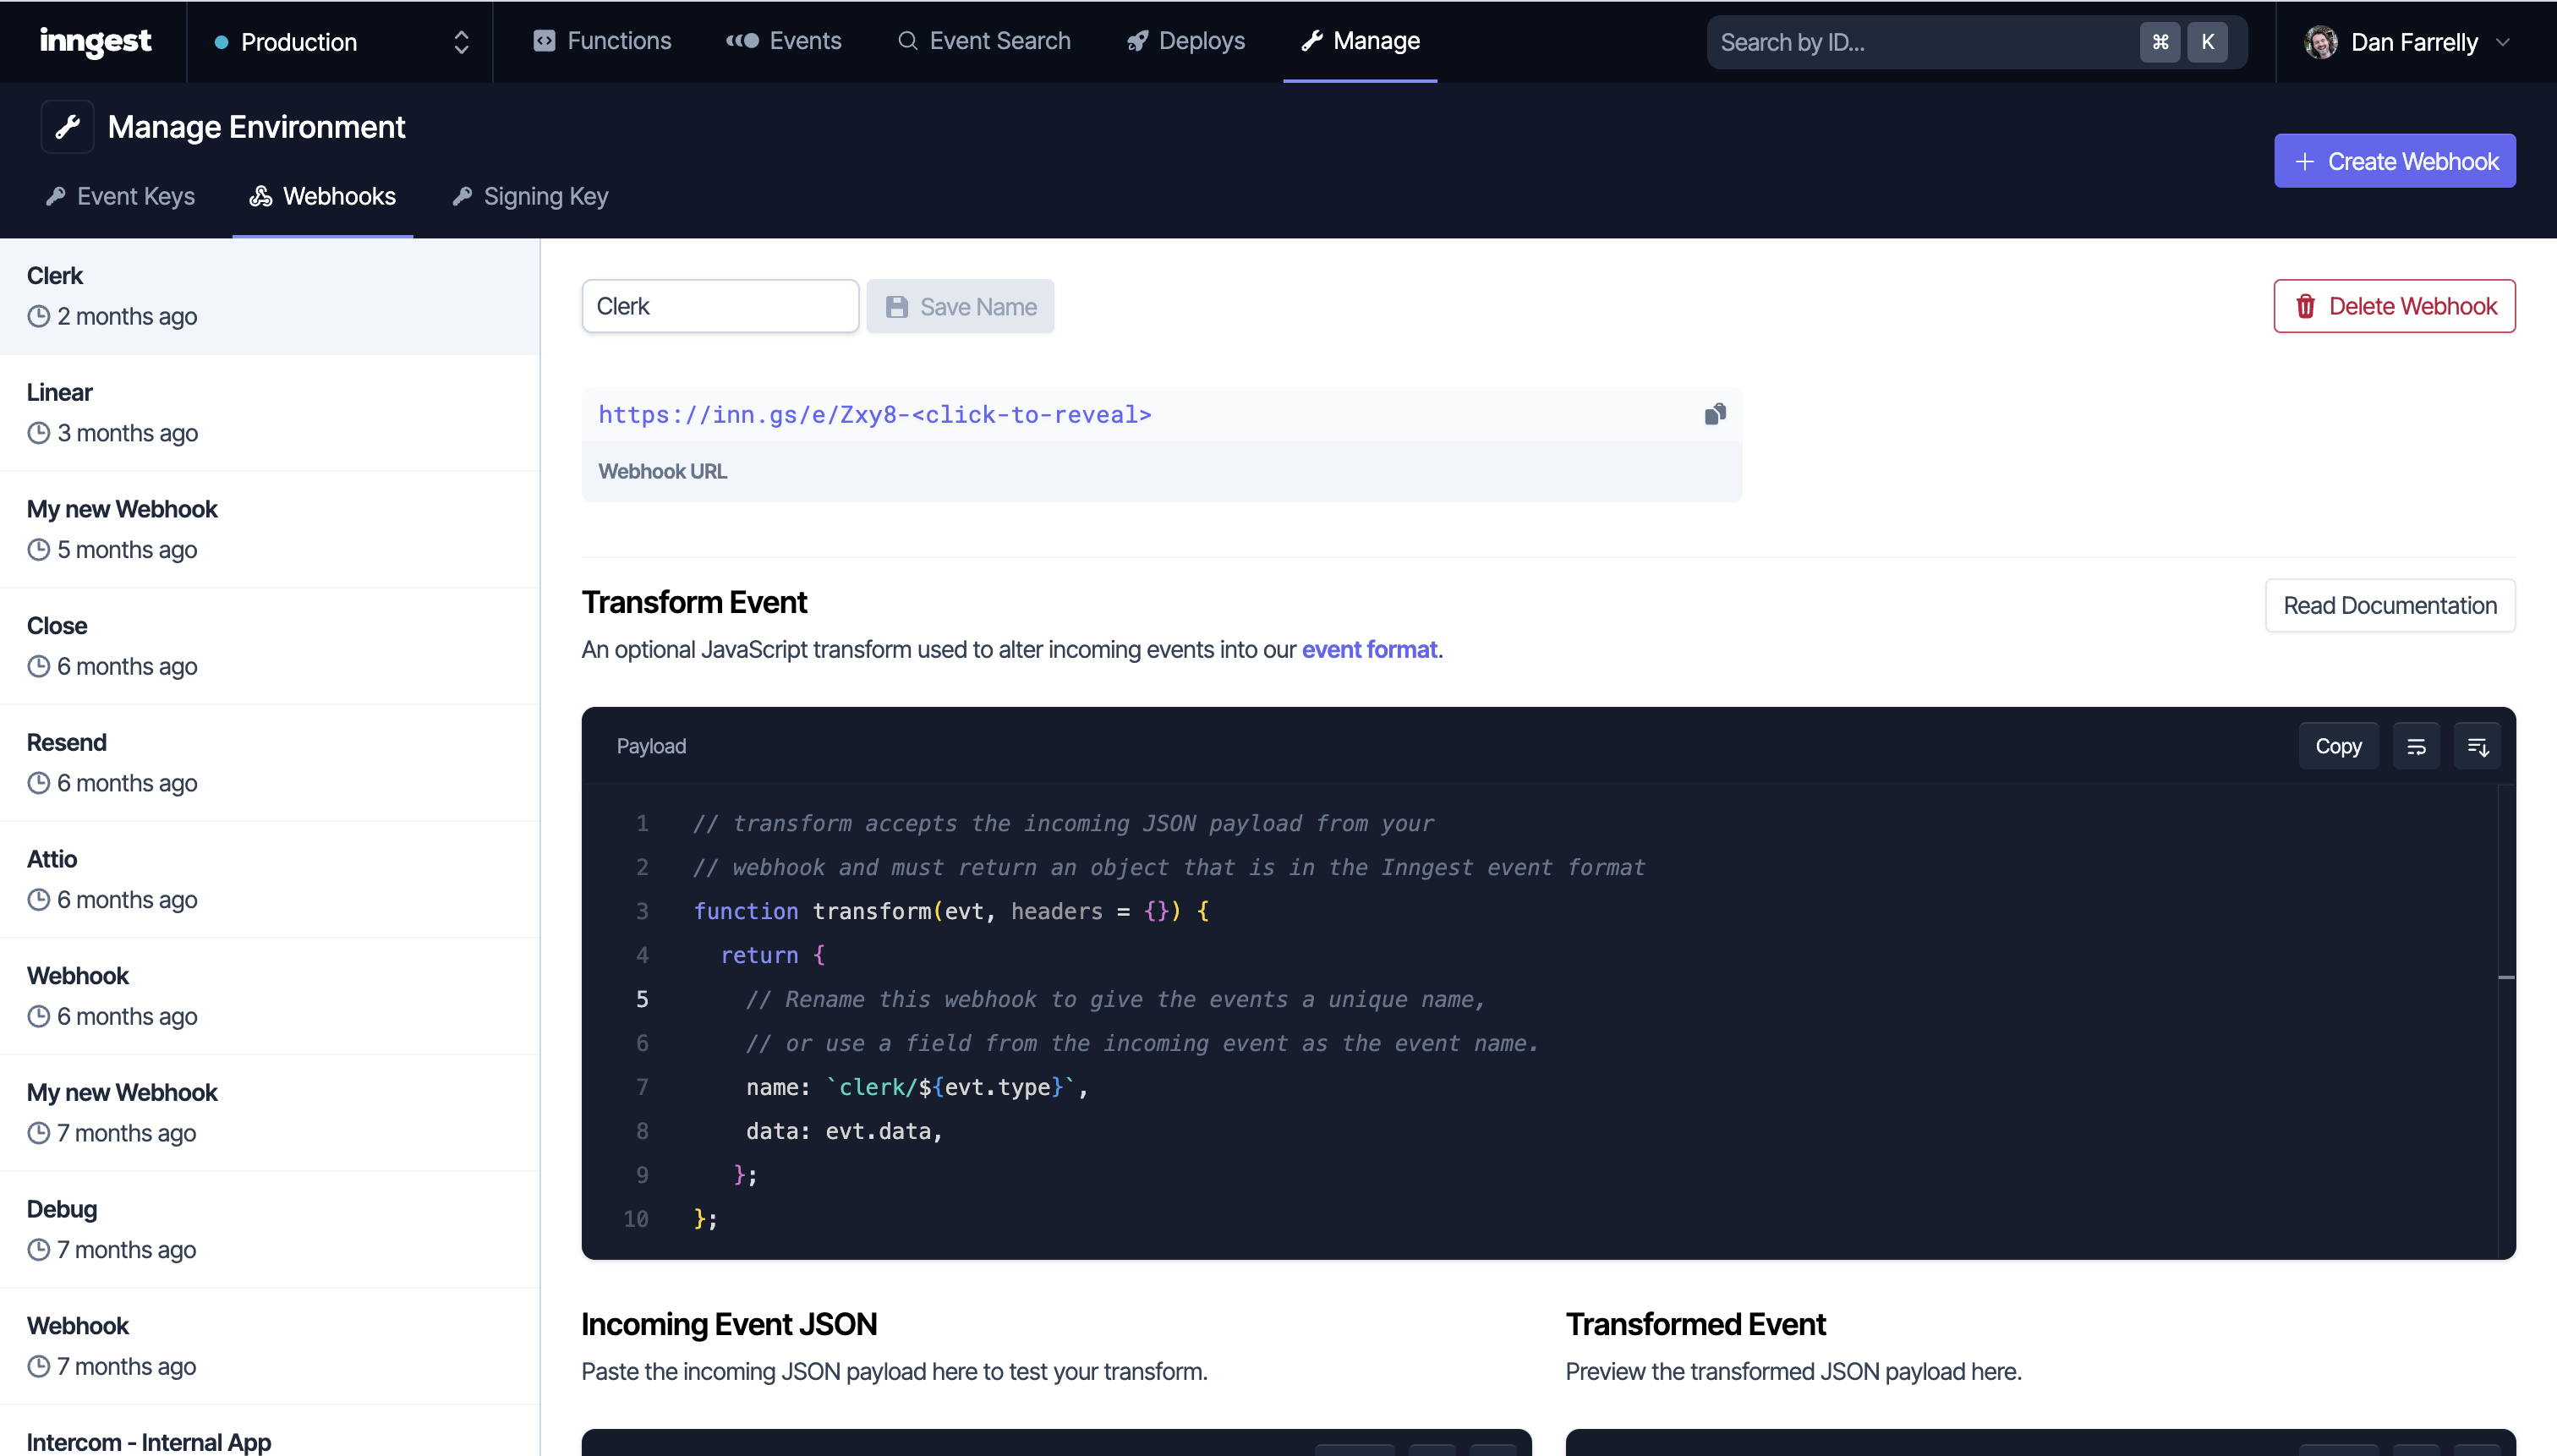
First, you'll need to head to the Manage tab in the Inngest dashboard and then click Webhooks. From there, click Create Webhook.
Now you'll have a uniquely generated URL that you can provide to any Producer service to start sending events. These URLs are configured in different ways for different producer services. For example, with Stripe, you need to enter "developer mode" and configure your webhook URLs.
Give your webhook a name and save it. Next we'll explore how to turn the request payload into Inngest events.

Defining a transform function
Most webhooks send event data as JSON within the POST request body. These raw events must be transformed slightly to be compatible with the Inngest event payload format. Mainly, we must have name and data set in the Inngest event.
Fortunately, Inngest includes transform functions for every webhook. You can define a short JavaScript function used to transform the shape of the payload. This transform runs on Inngest's servers so there is no added load or cost to your infra.
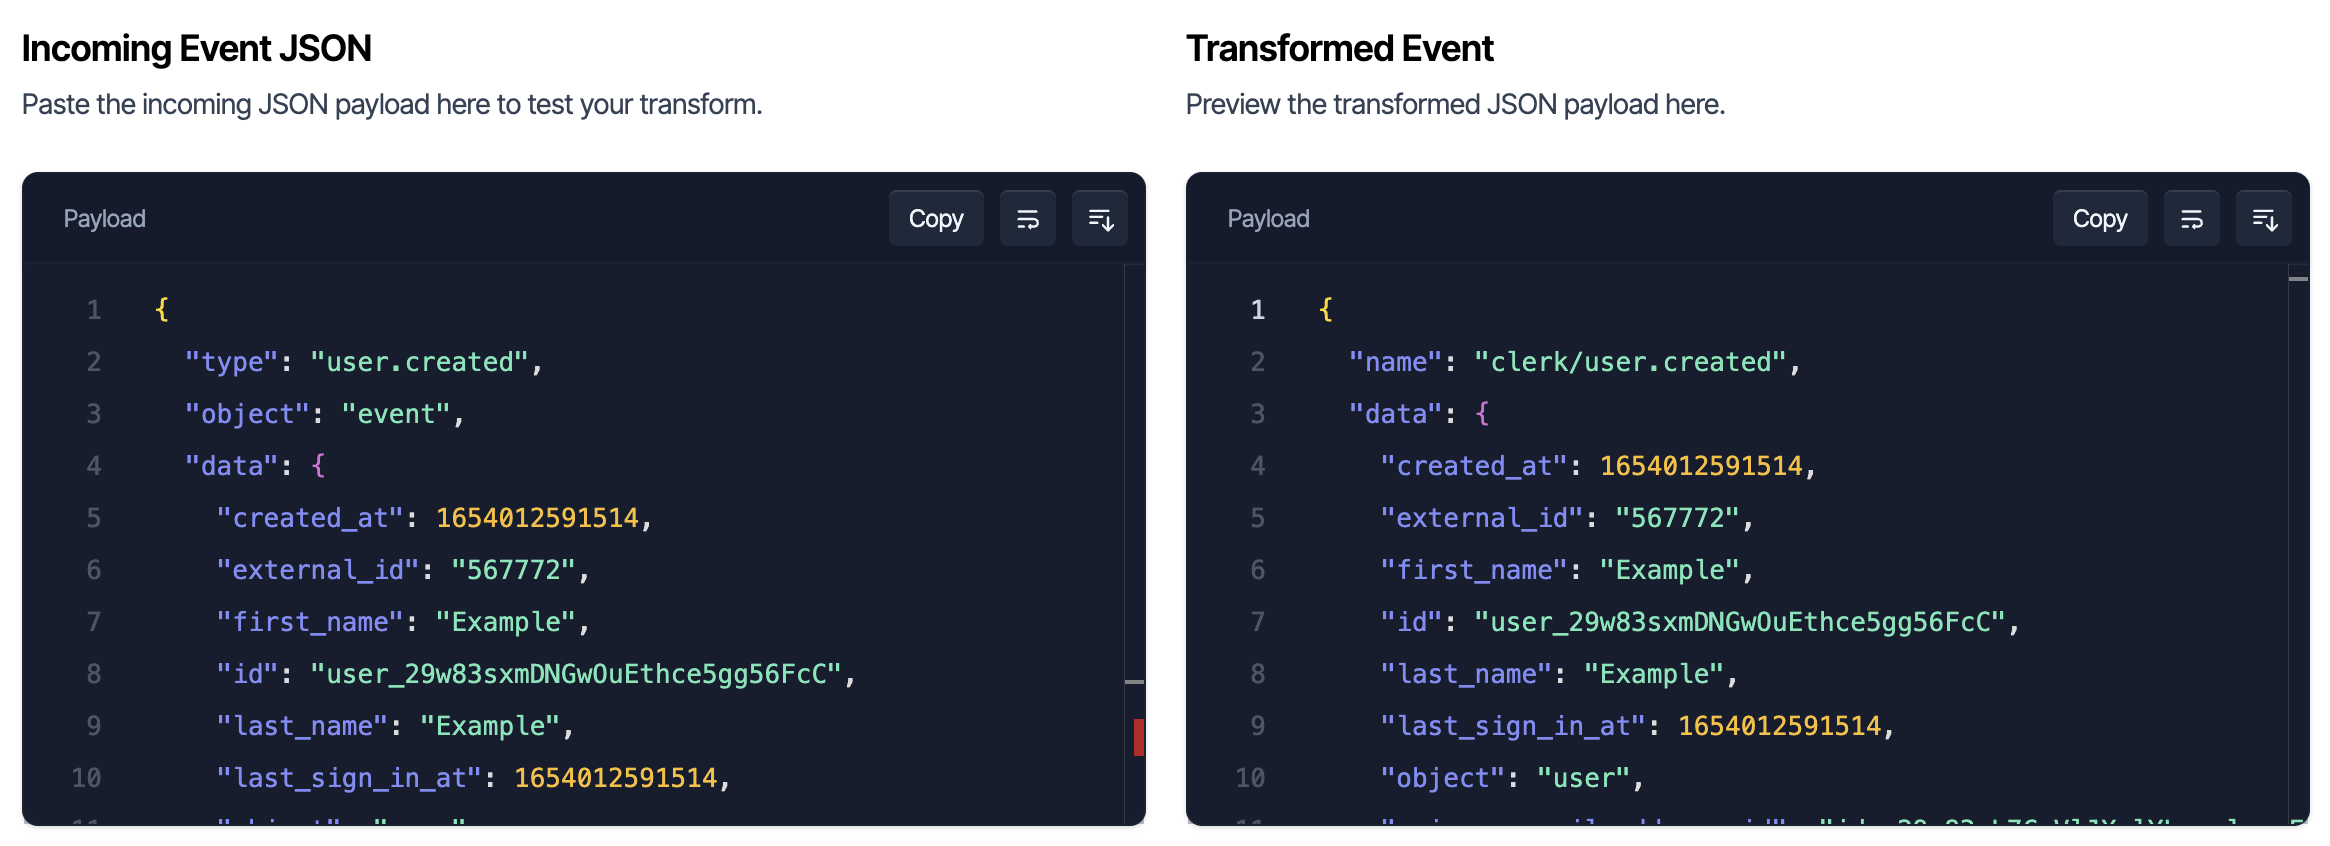
Here is an example of a raw webhook payload from Clerk on the left and our transformed event:
Example Clerk webhook payload
{
  "type": "user.created",
  "object": "event",
  "data": {
    "created_at": 1654012591514,
    "external_id": "567772",
    "first_name": "Example",
    "id": "user_29w83sxmDNGwOuEthce5gg56FcC",
    "last_name": "Example",
    "last_sign_in_at": 1654012591514,
    "object": "user",
    "primary_email_address_id": "idn_29w83yL7CwVlJXylYLxcslromF1",
    // ... simplified for example
  },
}
Example Inngest event format
{
  "name": "clerk/user.created",
  "data": {
    "created_at": 1654012591514,
    "external_id": "567772",
    "first_name": "Example",
    "id": "user_29w83sxmDNGwOuEthce5gg56FcC",
    "last_name": "Example",
    "last_sign_in_at": 1654012591514,
    "object": "user",
    "primary_email_address_id": "idn_29w83yL7CwVlJXylYLxcslromF1",
    // ... simplified for example
  }
}
Transforms are defined as simple JavaScript functions that accept three arguments and expect the Inngest event payload object in the returned value. The arguments are:
- Name
evt- Type
- object
- Description
The raw JSON payload from the POST request body
- Name
headers- Type
- object
- Description
A map of HTTP headers sent along with the request as key-value pairs.
- Name
queryParams- Type
- object
- Description
A map of parsed query string parameters sent to the webhook URL. Values are all arrays to support multiple params for a single key.
Here's a simple transform function for the Clerk example shown above:
function transform(evt, headers = {}, queryParams = {}) {
  return {
    name: `clerk/${evt.type}`,
    data: evt.data,
    // You can optionally set ts using data from the raw json payload
    // to explicitly set the timestamp of the incoming event.
    // If ts is not set, it will be automatically set to the time the request is received.
  }
}
👉 We also recommend prefixing each event name with the name of the producer service, e.g. clerk/user.created, stripe/charge.failed.
Example transforms
Github - Using headers
Github uses a X-Github-Event header to specify the event type:
function transform(evt, headers = {}, queryParams = {}) {
  const name = headers["X-Github-Event"];
  return {
    // Use the event as the data without modification
    data: evt,
    // Add an event name, prefixed with "github." based off of the X-Github-Event data
    name: "github." + name.trim().replace("Event", "").toLowerCase(),
  };
}
Stripe - Using an id for deduplication
Stripe sends an id with every event to deduplicate events. We can use this as the id for the Inngest event for the same reason:
function transform(evt, headers = {}, queryParams = {}) {
  return {
    id: evt.id,
    name: `stripe/${evt.type}`,
    data: evt,
  };
}
Linear - Creating useful event names
function transform(evt, headers = {}, queryParams = {}) {
  return {
    // type (e.g. Issue) + action (e.g. create)
    name: `linear/${evt.type.toLowerCase()}.${evt.action}`,
    data: evt,
  };
}
Intercom - Setting the ts field
function transform(evt, headers = {}, queryParams = {}) {
  return {
    name: `intercom/${evt.topic}`,
    // the top level obj only contains webhook data, so we omit that
    data: evt.data,
    ts: evt.created_at * 1000,
   };
};
Resend
function transform(evt, headers = {}, queryParams = {}) {
  return {
    name: `resend/${evt.type}`,
    data: evt.data,
   };
};
Testing transforms
The Inngest dashboard includes a tool to quickly test your transform function. You can paste the incoming payload from the webhook producer in the "Incoming Event JSON" editor and immediately preview what the transformed event will look like.

Some webhook producers do not provide example payloads in their documentation. If that's the case, you can use a tool that we built, TypedWebhooks.tools to test webhooks and browse payloads.
Advanced configuration
Additionally, you can configure allow/deny lists for event names and IP addresses. This can be useful if you want a bit more control over what events are ingested.
Inngest currently does not yet support webhook signature verification. While this means that you cannot use the signature to verify the authenticity of the payload, each webhook URL is unique and can only be used by one producer. This means that you can be confident that the events are coming from the producer that you expect.
Local development
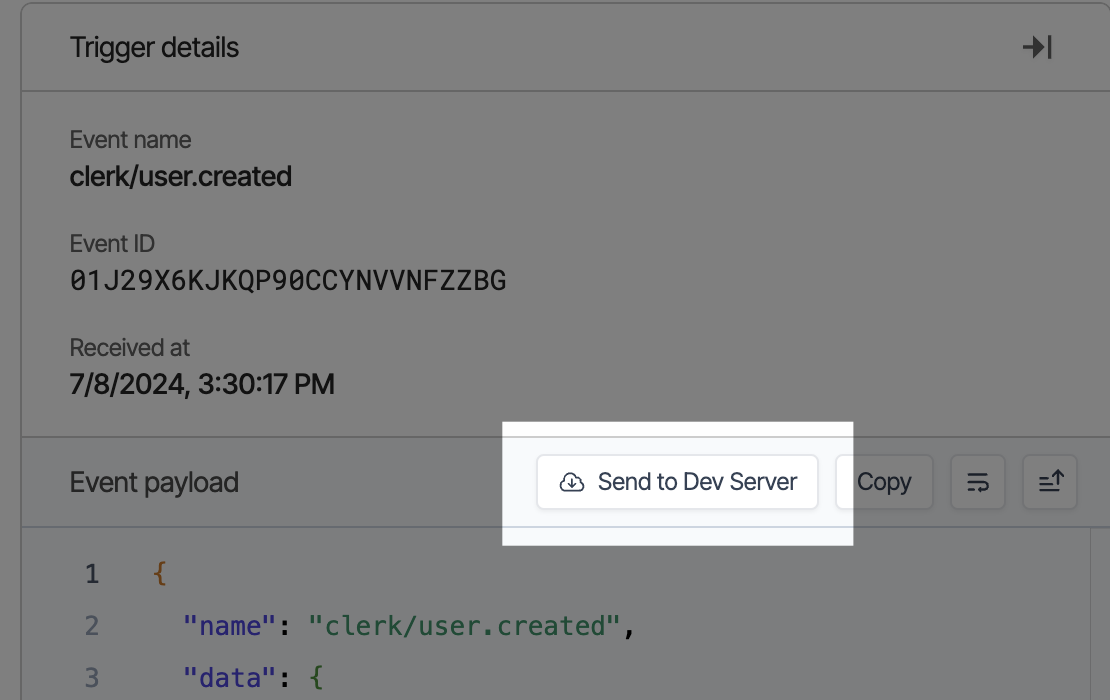
To test your webhook locally, you can forward events to the Dev Server from the Inngest dashboard using the "Send to Dev Server" button. This button is found anywhere that an event payload is visible on the Inngest dashboard. This will send a copy of the event to your local machine where you can test your functions.

Writing functions
Now that you have events flowing into Inngest, you can write functions that that handle the events that you care about. You can also explore the list of events that have been received at any time by heading to the Events tab of the Inngest dashboard.
Example: Send a welcome email when the clerk/user.created event is received
inngest.createFunction(
  { name: "Send welcome email", id: "send-welcome-email" },
  { event: "clerk/user.created" },
  async ({ event, step }) => {
    const emailAddress = event.data.email_addresses[0].email_address;
    await step.run('send-email', async () => {
      return await resend.emails.send({
        to: emailAddress,
        from: "noreply@inngest.com",
        subject: "Welcome to Inngest!",
        react: WelcomeEmail(),
      })
    });
  }
)
💡 Tip: To test functions locally, copy an event from a webhook from the Inngest dashboard and use it with the Inngest dev server's Send test button.